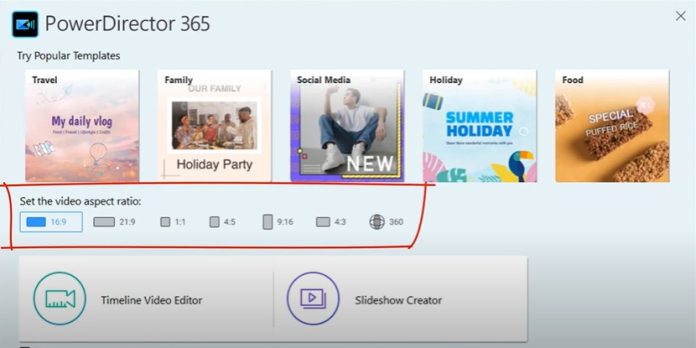
CyberLink PowerDirector is a powerful video editing software. It offers a range of tools for both beginners and professionals.
Users can edit videos, apply effects, and create high-quality content. This guide explains How To Use CyberLink PowerDirector.
Features of CyberLink PowerDirector
01) User-Friendly Interface
The layout is simple and well-organized. The timeline, preview window, and tools are easy to find.
02) Advanced Editing Tools
It includes keyframe controls, multi-cam editing, and motion tracking. These tools improve video quality and storytelling.
03) AI-Powered Features
It offers AI-driven tools like sky replacement, noise reduction, and object detection. These save time and enhance videos.
04) Huge Library of Effects and Transitions
There are many templates, transitions, and effects. Users can apply them easily.
05) Fast Rendering Speed
It supports GPU acceleration for faster exports. The software ensures smooth performance even with high-resolution videos.
06) 360-Degree Video Editing
PowerDirector supports 360-degree videos. It allows editing and adding effects to immersive content.
How to Use CyberLink PowerDirector
1. Installing and Setting Up
Download and install PowerDirector from the official website. Open the software and choose the preferred mode: Full Feature Editor, Easy Editor, or Slideshow Creator.
2. Importing Media Files
Click the ‘Import Media’ button. Select video clips, audio, or images. Drag and drop them into the timeline.
3. Basic Editing
Trimming Clips
- Select a clip on the timeline.
- Drag its edges to shorten or extend it.
Splitting Clips
- Place the playhead where you want to cut.
- Click the ‘Split’ button.
Adding Transitions
- Open the ‘Transitions’ tab.
- Drag a transition between two clips.
4. Enhancing Videos
Adding Text and Titles
- Click ‘Title Designer.’
- Choose a preset or create a custom title.
- Adjust font, color, and animation.
Applying Effects
- Open the ‘Effects’ tab.
- Drag an effect onto a clip.
- Adjust intensity and settings.
Using Motion Tracking
- Select a clip.
- Click ‘Motion Tracker.’
- Follow on-screen instructions to track objects.
5. Adding Audio
Importing Music
- Click ‘Import Media.’
- Select an audio file.
- Drag it to the audio track.
Adjusting Volume
- Right-click on the audio track.
- Choose ‘Volume Adjustment.’
- Modify levels as needed.
Adding Voiceovers
- Click ‘Voiceover Recorder.’
- Record your narration.
- Add it to the timeline.
6. Exporting the Final Video
- Click ‘Produce.’
- Choose a format (MP4, AVI, or MOV).
- Select resolution and quality.
- Click ‘Start’ to export.
Pros and Cons of CyberLink PowerDirector
Pros
- User-friendly interface.
- Wide range of effects.
- AI-powered tools.
- Fast rendering.
- 360-degree video support.
- Affordable pricing.
Cons
- Steep learning curve for beginners.
- Requires a powerful computer.
- Some features need additional purchases.
FAQs
Q1. Is CyberLink PowerDirector free?
It offers a free version with limited features. The paid versions provide advanced tools.
Q2. Can I edit 4K videos in PowerDirector?
Yes, it supports 4K editing and rendering.
Q3. Does PowerDirector work on Mac?
Yes, the latest versions are compatible with both Windows and Mac.
Q4. How can I add subtitles to my video?
Use the ‘Subtitles’ tool to manually add or import subtitle files.
Q5. What is the best export format?
MP4 is recommended for compatibility and quality.
Final Words
CyberLink PowerDirector is an excellent choice for video editing. It offers powerful features, AI tools, and fast rendering.
Both beginners and professionals can create stunning videos with it. Learning its features and tools will improve editing skills significantly.


[…] CyberLink PowerDirector 365 is a subscription-based video editing software that offers advanced features with regular updates. […]